The Vulcan Build
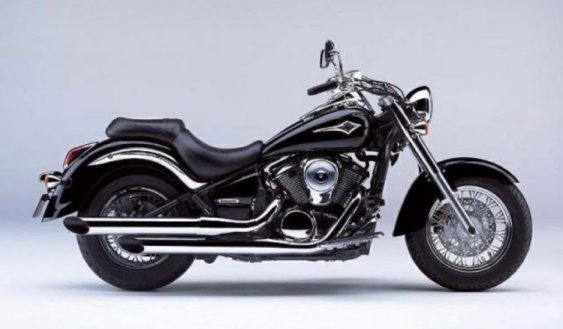 |
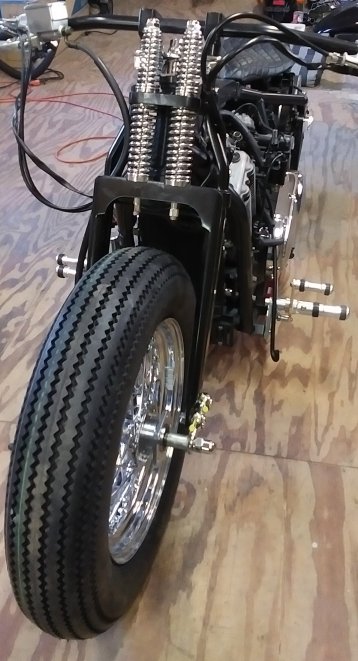
The Vulcan used to be a cruiser weighing in at 650 lbs. It was capable of carrying 2 people in an upright seating position. It was a fully equipped motorcycle capable of traveling on a sunny day or in rain. This particular donor motorcycle came with an optional windshield, floor boards and other factory and aftermarket accessories. The stance of cruiser motorcycles is normally pretty high to allow for comfortable supension travel and good lean angle. That is the exact opposite of the idea of a cafe racer/bobber which requires lower stance, single seat and stiffer suspension. The following pictures tell the story of the transformation process that the Vulcan underwent in order to become a cafe racer. |
| The very first few steps consisted of removing parts that were not needed which included parts of the seat frame. Some bolts and nuts were so rusted that we used the same angle grinder to remove those as well. | 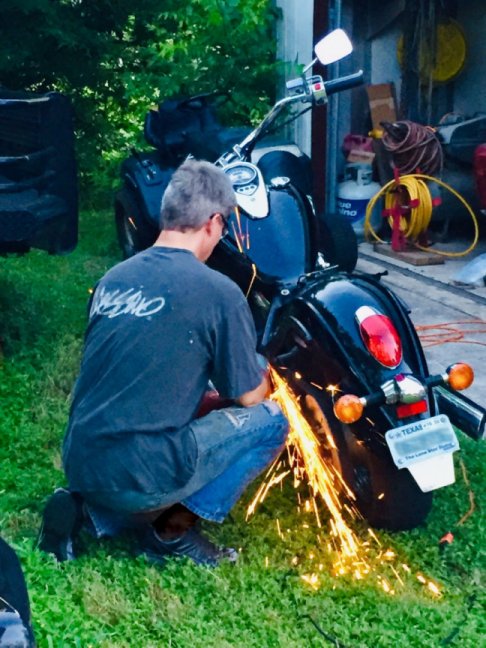 |
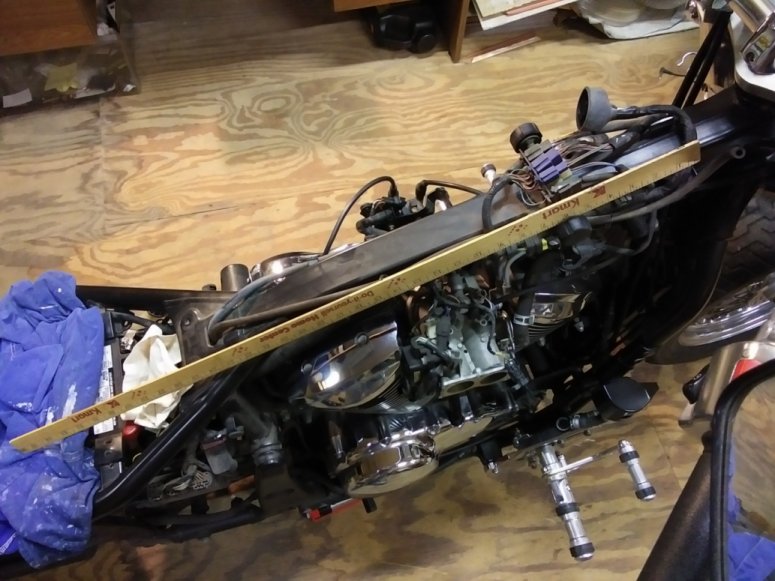 |
The most important part of the build was the fuel tank. It affected a lot of other parts of the build. We needed measure very carefully how much room we had, under what angle and what tank would fit this bike. All the wiring and plumbing along the frame would need to be rerouted to make room for the new tank because the chosen tank tunnel would not accommodate them. |
| The client chose a 2-gallon banana tank with 3 ports on the bottom and a standard 2" round-top tunnel. It required some frame massaging to get it to sit flush and securely. The fuel pickup fittings needed to be modified slightly to fit in the tight space between the bottom of the tank and the rear cylinder head cover. |  |
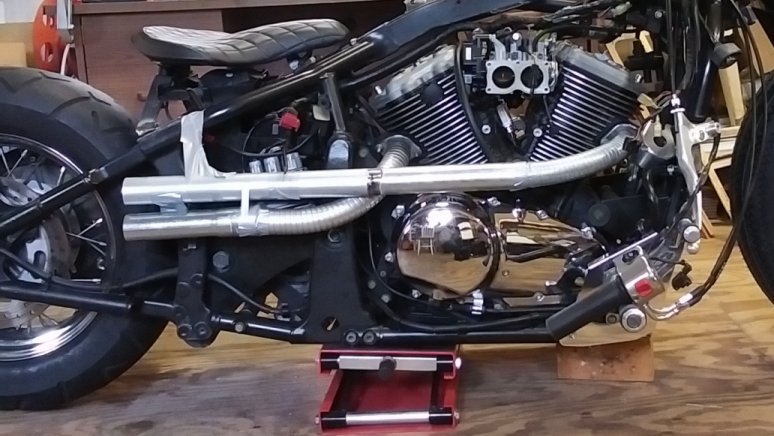 |
While discussing the exhaust style with the client, he requested the double-barrel design with header wrap for the vintage look.
First, we created some drawings and photoshopped pictures to give him an idea of what it would look like.
Once the client was happy with the digital mock-up, we fabbed up the exhaust system, added single-stage baffles and wrapped both pipes in header wrap. The tips were left exposed about 5" and painted with high-heat flat black paint. |
|
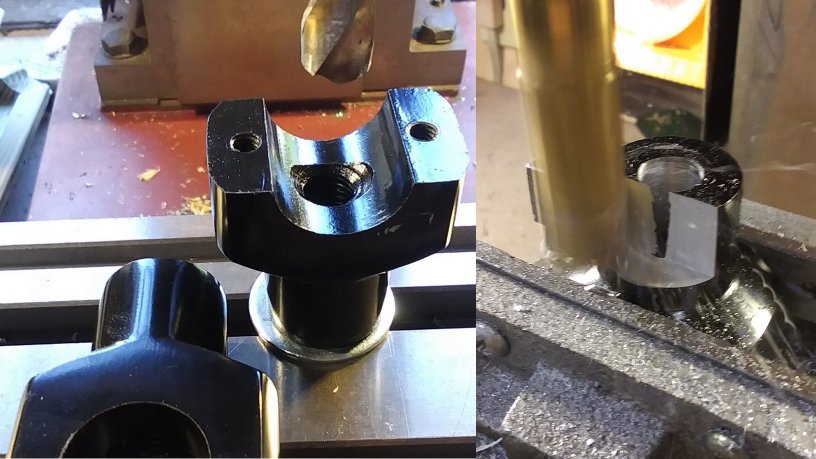
The front fork gave us quite a workout. After measuring 3 times, deciding on the correct fork length and ordering the part,
we had to go on a hunt for the correct neck bearing to adapt the metric neck to the SAE stem. And since nobody had one (during Corona lock-downs),
we had to make one custom. With the bearing in hand, the assembly was not as easy as expected. The stem was not up to spec so it did not fit and was hampering any assembly efforts. Eventually, with some machining and "convincing", we managed to put the fork together and install it on the bike. The stance was absolutely perfect, as desired. The customer was happy and that's all that matters. |
 |
 |
To complement the drop on the front of the frame, we needed to also drop the rear end. That required plenty of measuring,
especially due to the unusually complicated multi-link suspension system implemented by the manufacturer.
The actual method of lowering the rear was easier than most imagine, it only needed us to modify the shock mounting bracket
to move the shock attachment point higher and farther forward. After putting the bike back on the floor on its wheels, the frame was level, the stance was aggressively low and just amazing. |
|
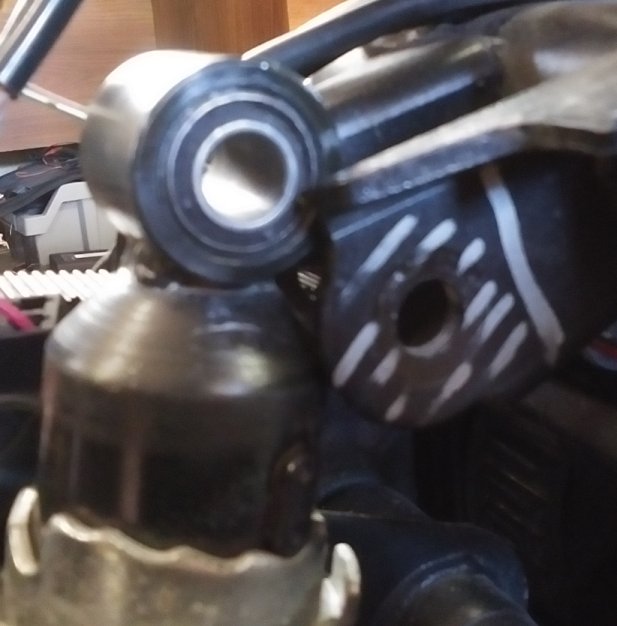
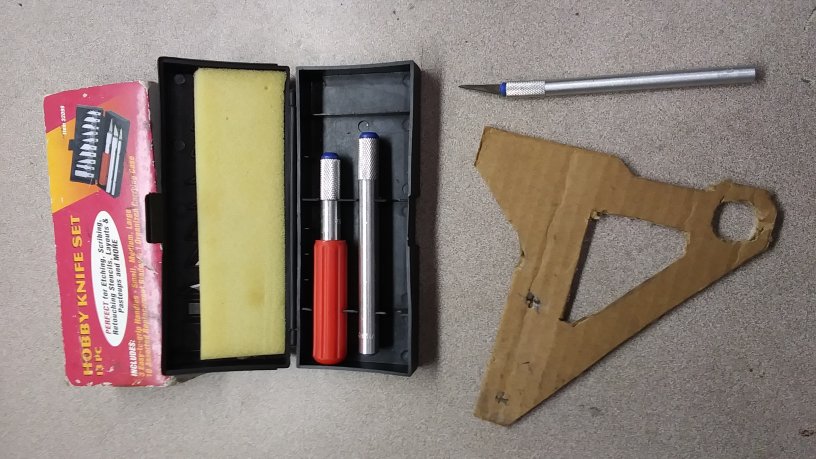
The customer opted to reuse the original brake caliper which meant that we needed to make a custom bracket for it.
After showing him a few options, we settled on a straight billet aluminum bracket with a turn-buckle. Again, we measured multiple times, transferred the measurements to paper and then cardboard. Customer approved of the design. The fit was good and the process continued with us creating a plywood mockup real quick. Another fitment stage with final adjustments and then the actual aluminum bracket was cut on a milling machine and painted, per customer's request. The brake hose was made custom to length with metric fittings to match up with the metric controls and caliper. |
 |
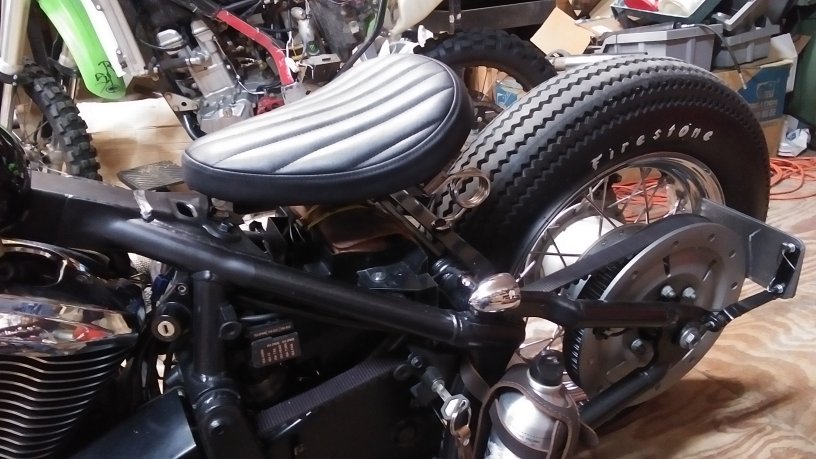 |
The seat was supplied with a front hinge bracket which we utilized after suggesting it to the client.
He agreed to reusing the stock OEM seat unlock mechanism (requiring the ignition key)
to release the rear of the seat and hinge it upward to access the cargo area, tool tray and battery underneath. The customer chose standard torsion springs for the seat which accentuate the vintage look nicely. The stitched leather design also adds desired ambiance. |
|
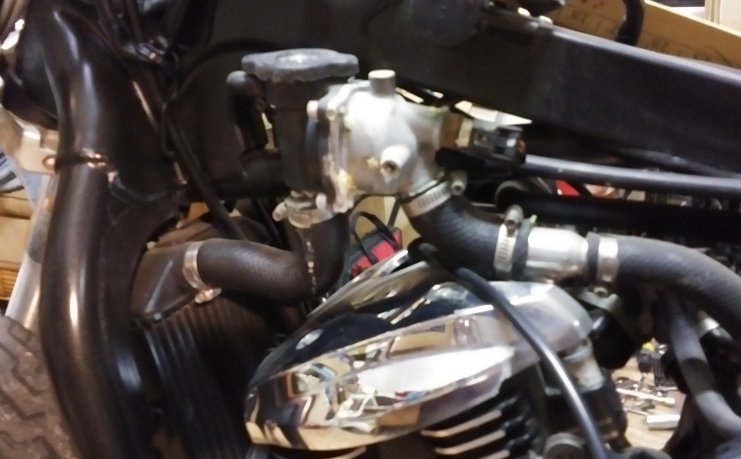
We expected to retain the original cooling system but there was still a small snag.
The thermostat housing was positioned so high and close to the frame that it was interfering with the new banana tank. We had to make some creative changes and reposition it lower and farther away from the tank. |
 |
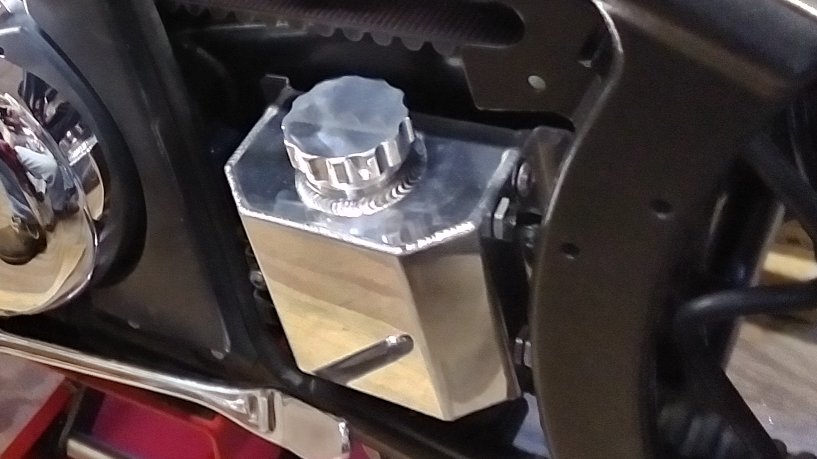 |
The factory OEM coolant overflow tank was plastic, faded, brittle and unsightly, not a good fit for the look we were going for.
The client requested a shiny polished aluminum tank to replace the OEM part. Fitment was very close and we had to get creative with the brackets but in the end, the slightly bigger tank does not interfere with the final drive belt or kickstand and the fittings protrude just right. |
|
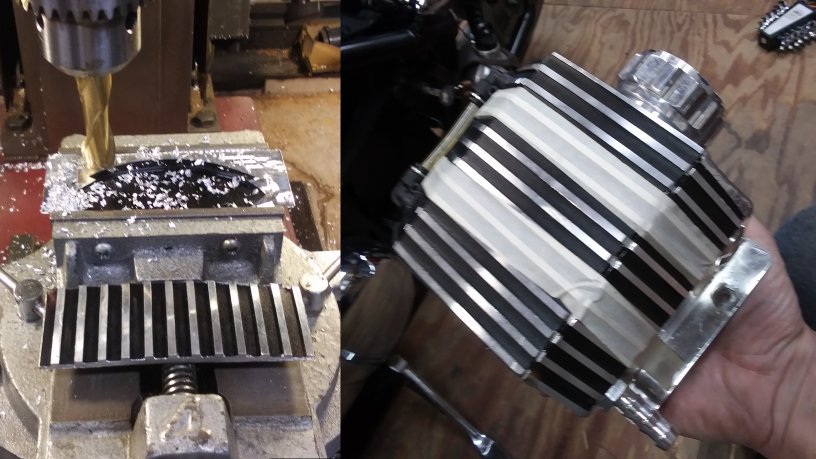
The client came to us with an idea to make the very shiny coolant overflow tank fit in more with the engine.
He supplied metal plates that were stamped and painted to look like the cooling fins on the engine cylinders and requested to make the tank look similar. The plates were not of ideal shape so the fitment was tricky but in the end, the result was good overall and the customer was satisfied which matters the most. |
 |
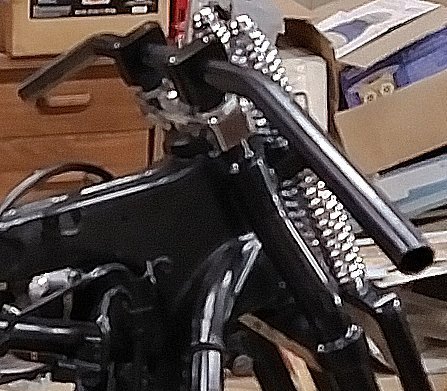 |
For the classic vintage look, we cut some standard handlebars down to 34" and turned them down to match the desired bent-over seated position on a cafe motorcycle. Some milling and cutting was required to accommodate the future electrical controls and their wiring which we chose to completely integrate into the handlebars instead of running it on the outside. The fewer the cables, the sleeker the look. |
|
To allow the handlebars to sit as low and as close to the fork as possible, we had to customize the risers.
The threads needed to be bored out to accept Allen-head bolts from the top and we also had to shorten them as much as we could afford
without losing structural integrity of the material under the hold-down bolts. The end result is pleasing, the bars sit just about a millimeter above the fork stem nut, which was also milled down to allow the handlebars to be positioned even lower. |
 |
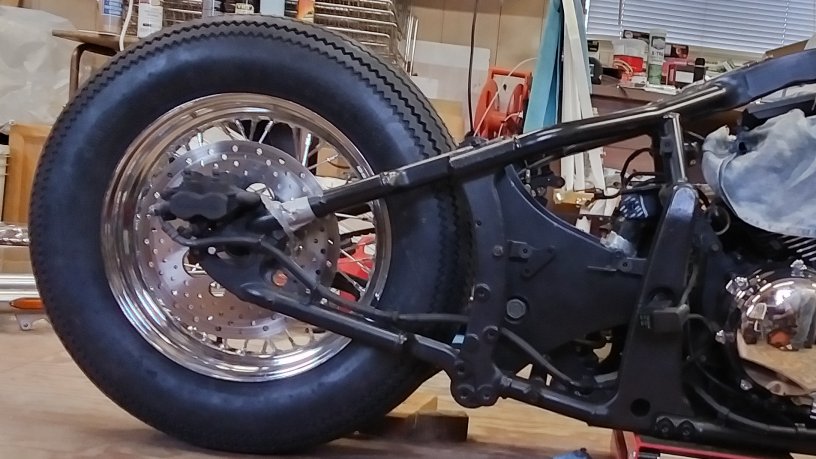 |
Our options for the rear wheel were slim. The problem we needed to solve was simple. The customer requested the rear rim to match the front. The front rim size is a 16"x3". Japanese cruiser motorcycles use 36-spoke wheels. American rims are sold punched for 40 spokes. Lacing a 36-spoke hub to 40 holes on a rim was out of the question. We ended up sending the rear wheel off with the whole hub to be custom laced to a plain rim that was not drilled yet. |
|
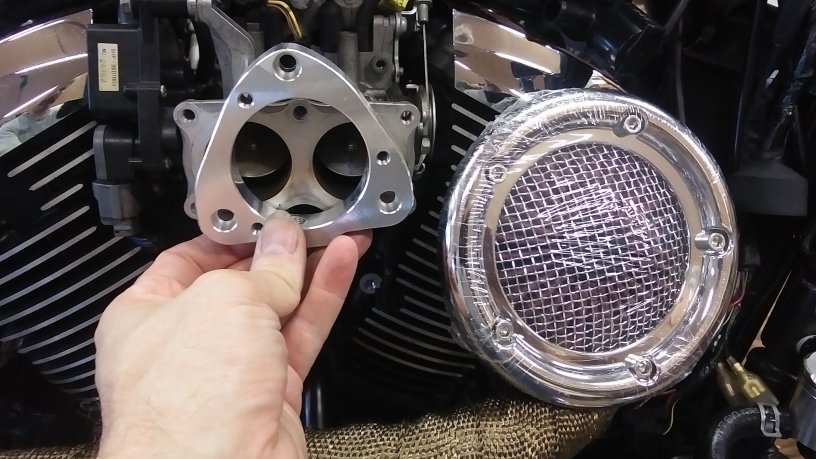
Buying and installing aftermarket cruiser parts on motorcycles in the USA has a clear disadvantage due to the market being saturated
with parts for HD motorcycles. So our chances of finding an air filter that would fit the Kawasaki throttle body
and would match the vintage style of the motorcycle were slim if not none. The solution was to buy a part intended for a HD and adapt it to fit the original throttle body. A thin adapter plate made of billet aluminum was the sensible choice here. |
 |
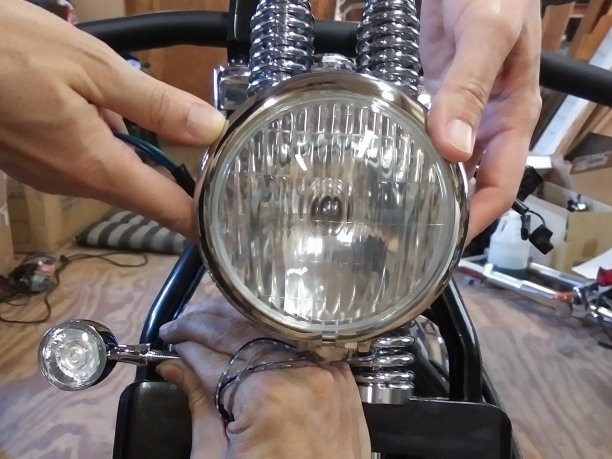 |
For lighting, the customer chose to go with German parts for the headlamp and turn signals. Once positioned properly and with accordance to local DOT regulations, they were mounted and wired. Since we chose to run electrical cables inside the handlebars and use simple push buttons for electrical controls, all of the lights needed to be wired to a custom designed control board to accommodate the logic for the lighting equipment. |
|
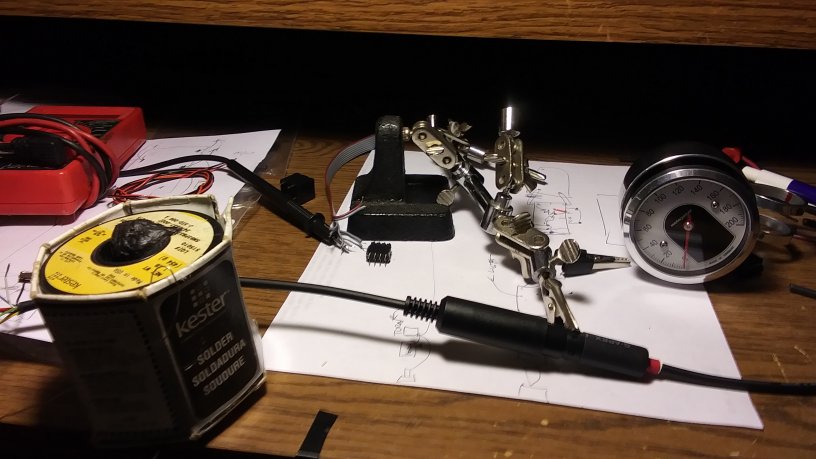
The miniature German speedometer fits nicely in the void between the banana tank and the front steering neck.
It required some wiring customization and we also chose to not hardwire it into the harness but use a connector instead. The assembly was tested on a test bench first. The speedometer part was tested using a function generator producing square pulses at specific frequencies that the speedometer would translate into proper needle deflection indicating specific speed. We were pleasantly surprised that the German manufacturer of the speedometer supplied documentation on how to calibrate the unit for the pulses from any motorcycle speed sensor. It made our job much easier and the calibration was accomplished in just one easy step. |
 |
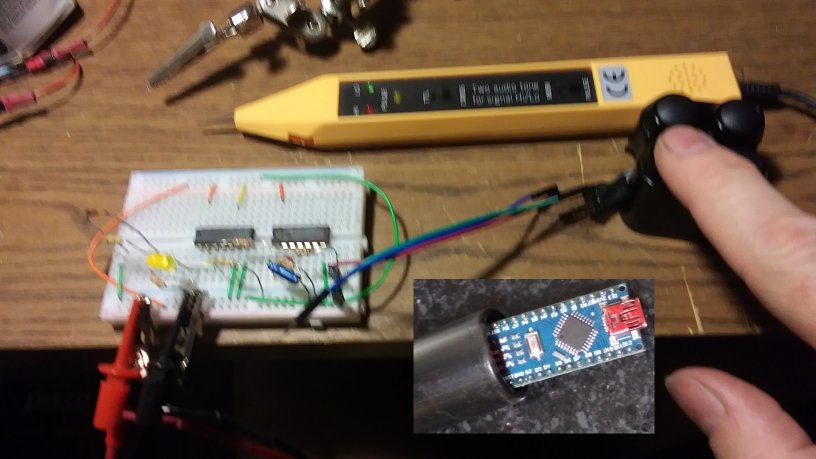 |
The slim handlebars were made to look clean without any electrical cables and the pushbutton controls were just that, pushbuttons. The buttons could not be wired in directly to operate the motorcycle like the OEM controls used to. That required a custom solution where we designed a digital control board which accepts input from the pushbuttons and controls whatever accessories are being controlled, such as turn signal, headlamp, horn, engine, starter etc. The whole digital control assembly fits inside the handlebars and it out of place and out of sight. |
|
Having removed all handlebar controls and some accessories from the original donor motorcycle,
the wiring harness needed to be pruned. That also gave us the option to run the wires through the frame
to minimize wire exposure and increase the sleek look of the motorcycle. We also took the opportunity to improve the harness in some places that required a little help. |
 |
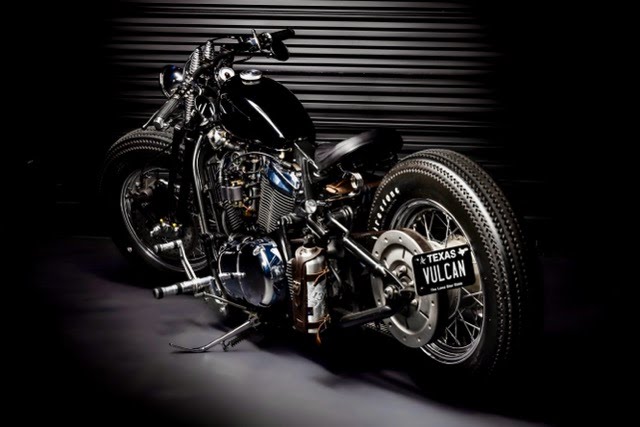 |
The end result is a light, low and sleek motorcycle of vintage look meant for racing from cafe to cafe,
as per the timeless British tradition that was started decades ago by our fathers and grandfathers. Finishing touches, like the extra fuel bottle, leather side carrier pouch and custom license plate, make the Vulcan what it is: a machine to marvel at, to admire. |